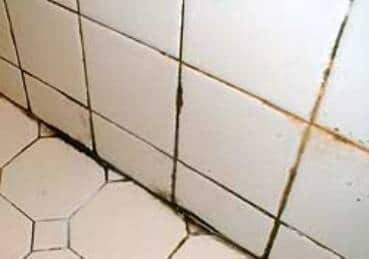
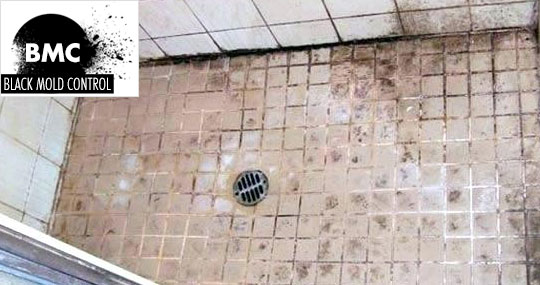
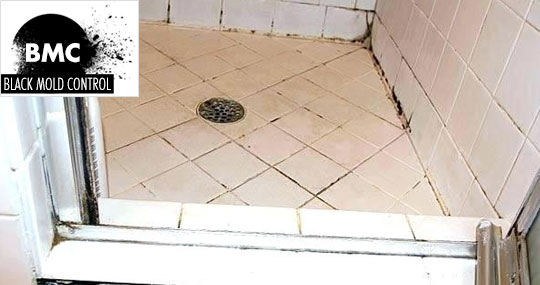
Mold is one of the most dreaded household discoveries, with horror stories on the news about black mold and health concerns. Mold loves damp areas, like under the sink, in wet wood and in shower grout. Removing black mold on grout can be quite a task, requiring personal protective gear and a lot of elbow grease.
If you want to get rid of mould in your shower for good make sure you do the job right the first time.

Table of Contents
Read the Frequently Asked Questions (FAQ) for dealing with black mold on grout.
Causes of mold growth on grout
Mildew will grow anywhere damp or wet, making an area like the shower a perfect home. Unfortunately, because the shower area is constantly exposed to moisture, keeping mould at bay requires prevention and staying on top of the problem. In addition to the moisture from the shower head, shower grout can also begin growing mold if the bathroom itself has a high humidity. Improper ventilation is a leading cause of mold growth. To prevent problems from occurring in the bathroom, try ventilating the room after your morning shower by opening the window. This should reduce the humidity in the room, allow the shower to dry quickly and keep mold at bay.
Types of black mold on grout
There are several types of mold that can be found in your kitchen or bathroom. Pink mold (it’s actually a bacteria) often shows up on the tile when there is not enough ventilation in the room or you do not dry the area. It’s fairly easy to clean but is also likely to come back, just like black mildew. Orange mold is often found outdoors growing on top of the mulch. If you keep plants in your bathroom or kitchen, you might see this fungus. Black mold is the worse type of fungus and if not cleaned correctly, will grow back quickly and frequently.

How to remove mold from grout?
Removing mould from grout is a tough job and has potential health hazards. Because mold reproduces through spores, extra caution must be taken to prevent breathing in spores in the air. Personal protective gear should be worn when handling and cleaning mold. There are many types of mold that grow in homes, some with worse reputations and hazards than others. One of the most dreaded forms, black mold, can cause serious health conditions. Black mold removal may be completed by you as long as the area isn’t too large and protection is worn.
Step-by-step process
Even though mold and mildew have been around for millions of years, you don’t want to see it growing in your home. As soon as you find this fungus in the bathroom, kitchen or any area where it is warm and damp, be sure to clean it up or have it professionally removed.
- Step 1: Wipe off dampness
To start removing the mildew, wipe off any dampness in the area. - Step 2: Determine the cause
If the mold seems to be located in only one area, try to determine the cause. Is the shower head or faucet leaking, causing continuous exposure to water? If so, fix the leak before continuing. - Step 3: Scrub, scrub, scrub
Once the area has been completely dried, scrub the entire area with detergent and a damp cloth. Every so often dry off the area and check how you’re doing. - Step 4: Clean all areas
When you’re not making any more progress with the damp cloth switch to an old toothbrush. This will allow you to get into the small areas of the grout and completely loosen and clear off the mold. - Step 5: Dry, clean and disinfect
When all signs of visible mold are removed dry the area one last time. The next step is cleaning and disinfecting the shower grout.
How to remove mold from tile grout?
 The essential items needed to remove mold from your tile grout are a stiff scrubbing brush, baking soda, and water. The removal steps are as follows:
- Step 1: Mix a paste
Create a paste of baking soda with water, place it on the grout between the tiles and begin to scrub. - Step 2: Clean mold
After scrubbing, apply the elbow-grease mold removal tool, let it sit in, and clean the mold away. - Step 3: Prolong scrubbing
You may need to prolong the scrubbing process so that you won’t use much elbow grease the next time. - Step 4: Rinse the tiles
Rinse the tiles with clean water. - Step 5: Dry the area
Turn on a fan or open the window to remove humidity and moisture, which helps to dry the tiles and get rid of bacteria. - Step 6: Black mold control
You may need to control mold after every shower, with a natural anti-mold solution, which is a mixture of vinegar or tea tree oil and water.
How to clean mold from grout?
Cleaning mold from grout requires a thorough scrub with warm water or baking soda. Below are the steps to clean a moldy grout.
- Step 1: Protect yourself
Wear gloves to protect your hands from friction and exposure to cleaning products. - Step 2: Sprinkle water
Fill your bucket with warm water and sprinkle gradually on small sections of grout. - Step 3: Scrub the grout
Using a narrow scrub brush, tile brush, a closed-loop microfiber cloth, or a stiff toothbrush, vigorously scrub the grout in a back and forth motion.
If warm water doesn’t help out, try using baking soda with the steps below:
- Step 1: Make a thick paste
Mix three portions of baking soda with one part of water and form a thick paste. - Step 2: Apply and wait
Carefully apply the paste on the grout and give it two hours to penetrate the surface. - Step 3: Sprinkle water
Sprinkle the grout with plain warm water and try scrubbing it again. - Step 4: Clean and rinse
Use clean water, or a clean sponge to rinse the grout. - Step 5: Dry the grout
Use a piece of clean cloth to dry out the moisture from the grout. You can turn on your fan or open your windows and ensure the grout is completely dry.
Can vinegar ruin your grout?
Yes, vinegar can ruin your grout. However, it happens when the grout is not sealed well, seeping into the air spaces within the surface. Below are ways vinegar ruins your gut.
Etching of the grout
As vinegar cleans the surface, it dissolves through the grout finish lines, making it appear dull, and it eventually creates wear. If the wear stays longer, it spreads along the entire surface, which makes the floor look like an acid attack. The spread of the wear also affects marble, travertine, concrete, and terrazzo surfaces.
Vinegar pH shift
Due to the acid nature of vinegar, it can change the PH level of a surface. As the pH changes, it reverses the reaction used to seal your gout, creating a different condition of the surface and reverting into a liquid form, which becomes ineffective.
Leeching grout dyes
Vinegar can leech out the dyes on your grout and lightens it, discoloring the grout with time.
How to clean grout in the kitchen?
Cleaning kitchen tiles are basically the same as cleaning the bathroom or shower. Use the same types of cleaners, but make sure you rinse well with warm water. You don’t want to leave any residue behind that might come in contact with food.
- Step 1: Scrub off dirty grout using warm water and a stiff brush in a circular motion, and then leave it for few minutes to dry up.
- Step 2: Mix vinegar with water
When you have your mixture, spray it in equal parts and let it stand for a few minutes then scrub with the brush. - Step 3: Apply baking soda and vinegar
Apply the baking soda paste, spray vinegar, and cover grout lines with more baking soda.
Let the mixture foam before you scrub.
- Step 4: Add hydrogen peroxide
Resistant stains may need hydrogen peroxide. Apply it in the form of a paste with baking soda. - Step 5: Rinse with clean water
Rinsing helps to avoid resettling of dirt in the grout lines. - Step 6: Steam cleaning
If there are persistent grout stains, you may need the help of various steam cleaners in the market. - Step 7: Dry off
Open the windows or put on a fan and let the grouts dry thoroughly.
To keep your kitchen grout and stain-free, spray often with vinegar and water at least once a week. You can also wipe with alcohol to maintain a mold and mildew free surface.
After trying all of your options for cleaning mold, if the fungus continues to come back and re-infest areas of your bathroom or kitchen, call in a professional to do the job for you.

5 ways to remove mold from shower grout
Option 1: Use hydrogen peroxide and baking soda to clean the shower. Be sure to wear gloves and a protective mask so you don’t breathe in the spores. Mix some baking soda with water to create a paste and apply to the affected area of pink or black mildew. Then spray some peroxide over the paste. Finally, scrub with a brush and rinse with water. Repeat if necessary.
Option 2: Use distilled white vinegar. This is a natural product and usually doesn’t cause the grout to discolor or fall apart. Use a spray bottle to soak the mildew area with vinegar. Let it sit for about 30 minutes and then scrub if necessary. Rinse with warm water and wipe the shower dry.
Option 3: Use chlorine bleach. You will need to make sure the area is well ventilated and wear a mask when working with bleach. If you have colored grout, do not use this option. Using a spray bottle with 1 part bleach to 2 parts water, spray the black, orange or pink mildew. Let the bleach sit for at least 30 minutes and then carefully scrub with a brush. Rinse with water and pat dry.
Option 4: Use a commercial cleaner. There are many products on the market that will help clean fungus off your grout. They usually come in a spray bottle and require the solution to sit on the area for a specified amount of time. As with bleach, be sure to use protective gear when working with chemicals to clean black, pink, and orange mildew.
Option 5: A final solution to cleaning out mold is to remove the affected areas and reapply. If you have tried everything else, you might want to call in a professional to try and clean the area or take the opportunity to change the grout and make your shower like new again.
Best mold grout cleaners
Whether you are looking for a natural way to clean the bathroom and kitchen or a commercial cleaner, you have options. Use vinegar, baking soda, or hydrogen peroxide to clean between your tile naturally. Or you can purchase a variety of cleaners that contain bleach or use bleach and water to whiten and brighten the area.
Prevention tips
Preventing mildew from invading your home is simpler than it seems. Because mildew loves moist or damp areas, make sure rooms like the laundry room, kitchen and bathrooms are well ventilated. This allows showers to dry properly after use and discourages mold growth. Dehumidifiers can also be helpful in smaller rooms like the bathroom that have a high humidity level. Another big cause of mould is leaky plumbing. Periodically check for leaking pipes, faucets and shower heads to make sure you aren’t allowing a mold problem to grow unnoticed.
Warnings
There are many warnings associated with mold removal. First, always wear protective gear to prevent the inhalation of spores. Mold can cause many health conditions and breathing in even a small amount can be harmful. The area should be properly ventilated while you’re working to prevent cleaning fumes from overwhelming you as well. If the affected area is large or seems like too tough a job, don’t be afraid to call for professionals. Because of the dangers of mold removal it’s sometimes best to allow professionals to do the job. Lastly, use caution with the cleaning supplies you use to disinfect the area. Remember to never mix ammonia and bleach, which will create a poisonous gas called chlorine gas.
Protective gear for the removal process
The tools you’ll need to remove mold from grout include: spray bottle, bleach, baking soda, scrub brush, old toothbrush, old wash cloth and detergent. Protective gear is also recommended, especially if you’re working with a large amount of mildew or a particularly dangerous form. Gloves, goggles, masks and a mold respirator are recommended by the EPA whenever you’re cleaning up mould, which poses many health hazards when inhaled.
Frequently Asked Questions
Welcome to our Frequently Asked Questions (FAQ) section dedicated to tackling the persistent issue of black mold on grout. Whether you’ve encountered this stubborn problem in your bathroom, kitchen, or shower area, we understand the concerns and health implications it may pose. In this comprehensive FAQ, we aim to provide you with valuable insights, expert guidance, and practical solutions to effectively combat black mold on grout. From understanding its causes and health risks to discovering the best cleaning methods and preventive measures, we’re here to empower you with the knowledge to keep your living spaces mold-free and healthy. Let’s delve into the essential questions and find the answers you need to conquer this common household challenge.
Question:
What causes black mold to grow on grout?
Answer: Black mold on grout develops in damp and humid environments, where moisture accumulates and organic matter is present, such as in bathrooms, kitchens, and shower areas.
Question:
Is black mold on grout harmful to health?
Answer: Yes, black mold on grout can pose health risks, especially for individuals with allergies, asthma, or weakened immune systems. Prolonged exposure to mold spores may lead to respiratory issues and other health concerns.
Question:
How can I identify black mold on grout?
Answer: Black mold appears as dark or black spots on grout lines and may have a slimy or fuzzy texture. It often has a musty odor and can spread if not addressed promptly.
Question:
Can I remove black mold from grout myself?
Answer: Yes, you can remove black mold from grout with proper cleaning methods and safety precautions. It’s essential to use appropriate cleaning products and protective gear.
Question:
What are some effective cleaners for removing black mold on grout?
Answer: There are commercial mold removers, hydrogen peroxide, vinegar, and baking soda, which can be effective in cleaning black mold from grout. We’ll explore their usage in the article.
Question:
Are there natural remedies for removing black mold on grout?
Answer: Yes, natural remedies like vinegar and baking soda can help remove black mold from grout. We’ll provide step-by-step instructions on how to use them effectively.
Question:
How can I prevent black mold from returning on grout?
Answer: Regular cleaning and proper ventilation are crucial in preventing black mold growth on grout. We’ll offer practical tips to maintain a mold-free environment.
Question:
Can I use bleach to clean black mold on grout?
Answer: While bleach can be effective, it may not penetrate porous grout well and might cause damage. We’ll discuss the pros and cons and provide safe usage guidelines.
Question:
What should I do if the black mold on grout keeps coming back?
Answer: Recurring mold might indicate an underlying issue. We’ll offer troubleshooting tips and advice on when to consult professionals for thorough mold removal.
Question:
How often should I clean grout to prevent black mold growth?
Answer: Regular maintenance is essential. We’ll recommend a cleaning schedule and best practices for keeping grout mold-free.
Question:
Can black mold on grout spread to other areas of the home?
Answer: Yes, mold spores can travel through the air, potentially affecting other areas. We’ll explain how to prevent cross-contamination and control mold spread.
Question:
What should I do if the black mold infestation is severe?
Answer:In cases of extensive mold growth, seeking professional mold remediation is recommended. We’ll discuss when it’s best to call in experts for safe and thorough removal.
