Do you encounter black mold on shower caulk? Mold is probably the most unwelcome element in any shower stall, and the unfortunate truth is that mold spores are present everywhere at all times. When the spores are given moisture and food, they will multiply at a staggering pace. Attacking the problem very early will prevent damage to the walls that support the shower tile and caulking. Black mold can be removed and recurrence can be prevented by following these steps.
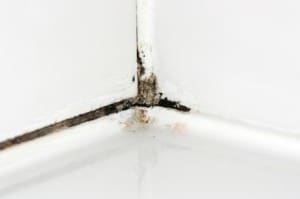
Table of Contents
What causes black mold on shower caulk?
Mold grows where moisture is present for long periods of time. When the relative humidity level in the bathroom remains above 60 percent due to poor ventilation, the spores that are present in any home will attach to the shower caulking and begin to multiply. Mould will feed on wood, soil, cloth or paper. Most of these substances are present in the bathroom all the time. Take a look at the EPA’s brief guide for mold and moisture in your home.
Shower caulk mold removal
When black mold is noticeable on the shower caulking, take the following steps to stop the growth process and remove the mold from shower caulking:
Step 1: Protect yourself by wearing the recommended gear listed below.
Step 2: Ventilate the area by opening windows and the bathroom door. Turn on the bathroom ventilation fan and open a window, if possible. Keep the bathroom door open.
Step 3: Mix one cup bleach with one gallon of water.
Step 4: Fill a spray bottle.
Step 5: Remove towels from the area to prevent spots on the fabric.
Step 6: Spray the area that has visible black mold.
Step 7: Wait 30 minutes and then rinse with fresh water.
If the mildew does not wipe away, it could be growing within the caulk. If the mold has penetrated the caulk surface, the only answer is to remove the caulk and replace it with mold resistant caulk designed for bathrooms.
During this process, if you begin to feel light-headed, leave the area for a few minutes. For extensive jobs, work in small increments of time to reduce the impact of the cleaning solutions.
3 alternative ways for shower caulk removal
- Hydrogen Peroxide – hydrogen peroxide is an anti-fungal, anti viral and antibacterial solution. Putting some hydrogen peroxide on a sponge or scrub brush and scrubbing the black mold would remove the it from the caulk.
- Vinegar – Vinegar can kill 82% of mold species. Vinegar is a mild acid that can be used to kill the fungus. Spray the vinegar onto the caulk sealant and let it sit for about an hour. After the hour has passed, come back and scrub the vinegar from the caulk. This will remove and kill the black mold.
- Baking Soda – Baking soda will not only kill the black fungus, but it will absorb some of the moisture to help keep it from coming back. Simply put a quarter teaspoon of baking soda into a spray bottle with water. Shake the bottle until it has dissolved. Spray onto the sealant and scrub with a scrub brush until it is removed, then rinse with water. Then spray the area again and let it dry to help prevent it in the future.
Clean and disinfect the area
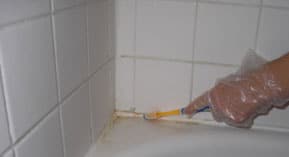 After the mould has been removed, the rest of the surfaces of the shower must be purged of mildew spores to prevent re-growth of mold on shower caulking. One of the most effective ways to remove the invisible mold spores is to spray the entire shower stall with the bleach mixture and then rinse and dry the shower walls and fixtures. Perform this task just prior to leaving the house for at least 48 hours. When the shower is allowed to dry completely, the spores that are present will die. Then the mold prevention tips can be implemented with a completely clean shower stall.
Best shower cleaners for mold
1) Lysol Mold & Mildew Blaster with Bleach
This Lysol cleaner is a great option for removing black fungus from the shower. This cleaner kills 99.9% of bacteria and viruses. It’s a great option for removing soap scum and it will give a nice shine to the bathroom surfaces. This is a must have cleaner for your shower.
2) Puracy Organic Home Care Set
If you prefer to use a non-toxic all natural cleaner this is a good option. This multi-surface cleaner will clean the fungus from the shower and leave a pleasant smell behind. It is a plant derived cleaner that is the perfection option for non- toxic cleaning.
3) Complete Mold Killer & Remover DIY Bundle
This cleaner is very easy to use. There is no scrubbing required, simply spray it onto the caulk sealant and let it sit for 15 seconds. It will remove and kill the fungus. This bundle also comes with the RMR-86 which will remove the stain caused from the fungus.
4) ForceField ScumBlaster Bundle
This bundle kills and removes stains from black mold. It works well on hard surfaces, so it is perfect for the shower caulk. Spray this on the fungus, wait while it works some magic, and then rinse. You can spray this on daily to help prevent in the future.
How to remove mold from silicone caulk?
The best way to remove mold from silicone caulking is to remove the caulking and replace it with a fresh bead of caulking. Yes, this is harder than simply cleaning it but it is the best way to do it and ensure it does not come back.
You should also remove any sources of dampness that is is causing the caulking to get wet (if possible).
Clean mold off silicone caulking
A second option is to clean the mold off of the caulking. This is only recommended if the mold is very limited in size and growth. I would say anything that is less than five or six inches in length can be cleaned, then monitored to see if the mold comes back. If it does come back I would remove the silicone caulking and replace it with fresh caulking.
When you replace the caulking you should investigate the type of caulking you use. There are some new brands of caulking that are mold resistant or are treated with a chemical that kills mold. As always if you are not comfortable doing the job yourself call a local contractor that has experience in removal and or working with mold. They will often know how to control the issue, remediate it and fix the ongoing issue that caused the mold.
How to remove mold between silicon sealers?
If you have silicon sealers around your shower that have mold behind them then again you need to remove the silicon sealant, clean up/remove the mold. Finally ensure the surface is clean and dry then reapply the silicon sealant to the surface.
How to prevent moldy shower caulk
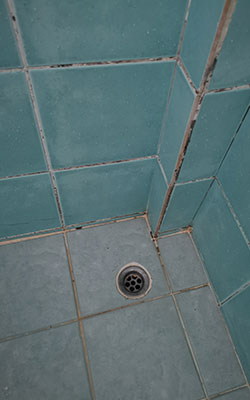 Moisture reduction and control are the keys to preventing mold from growing on surfaces in the home. In very humid climates, proper ventilation and the use of air conditioning and de-humidifiers in the home will lower the humidity level to the preferred range of 30-50 percent relative humidity. In arid climates, outdoor air can be utilized to reduce the humidity level in the home. After every use of the shower, follow these recommendations to reduce the recurrence of mold.
Vented bathroom fan – Building codes have been updated to require one vented fan in every bathroom. Older homes are exempted from this requirement until the bathroom is remodeled. If there is a fan present, ensure that the exhaust pipe is vented to the outside of the home and not just into the attic area. Run the fan for one full hour after using the shower.
Remove wet towels – Instead of hanging towels on the racks in the same room, consider hanging the towels outside to dry or run them through the dryer. When mold is an issue, wet towels are one of the main sources of moisture and must be removed to lower the relative humidity level in the room.
Dry the shower stall – Water will cling to the shower tile and caulking during and after a shower. Use a towel to dry the shower walls and then remove the towel from the room.
Clean shower walls weekly – Use a cleaner that contains bleach to kill the mold spores that might have collected in the shower since the last cleaning. Follow the directions closely to use the cleaner properly and attain the best possible result.
Measure humidity – A small humidity meter can be purchased from the hardware store. Place the meter close to the shower and run the bathroom fan until the relative humidity level drops into the acceptable range of 30-50 percent.
Renovation tip: use mold resistant caulk
Using a mold resistant caulk will help with avoid it in the shower. An acrylic caulk is usually recommended in a bathroom. This protects against moisture, which is important in a shower. The caulk is hard for the fungus to penetrate, which makes it resistant. This will help keep fungus out, so you do not have to get rid of it in the future.
Tools and protective gear
Closely follow these recommendations to protect yourself from mildew spores that will permeate the air during the mold remediation process.
- Gloves and eye protection must be worn to protect the skin from cleaning agents and mould spores.
- A mask to cover the nose and mouth must be worn to prevent the inhalation of mould spores that are dislodged from the surface of the shower wall.
- Place the bleach and water solution in an adjustable spray bottle.
- Have a full bucket of hot clear water available to rinse the surface with a clean sponge.
- For extensive mildew removal, wear a disposable paper overall that can be discarded when the job is completed.
Warnings
Mold can pose dangers to people with respiratory diseases and allergies. Prior to attempting to remove the black mold from shower caulking, heed these warnings:
- Wear all recommended protective gear.
- Evaluate your personal ability to complete the project.
- If the caulk must be replaced, do not start the project if enough time is not available to completely finish replacing the caulk. The shower will not be available for use if all the caulk has not been replaced and allowed to dry completely.
- Do not delay! If you do not possess the ability to remove the mold, find a reputable professional to correct the problem.
- Serious health problems can result from black mold.
Normal shower use creates enough moisture to encourage mould spores to attach to the shower wall and begin to grow. Take the recommended steps to prevent black mold on shower caulk from growing and causing damage to belongings and threats to health.
